MCCC Self-Service Student Planning
Worried about completing your degree on-time or making sure you select the correct courses for your degree program?
Student Planning is a Self-Service web-based solution that helps students plan and track course completion.
Student Planning also facilitates effective communication between students and advisors.
Here are some of the key features of this tool:
- Plan course schedules in advance
- Register for courses as soon as registration is open
- Advisement through Student Planning.
- You'll always know who is your advisor
- No more scheduling conflicts if you want to arrange a meeting with an advisor
- Students and Advisors can post notes in Student Planning. These notes are also saved and archived.
- Keep track of your Degree program progress through the progress page and view your actual course requirements for your degree program.
- See test scores (ACCUPLACER, TOEFL, CLEP and SAT/ACT)
- Student can access an unofficial transcript
Student Planning: Frequently Asked Questions by Students
- Where can I find the new Student Planning? ➤ Go to http://www.mccc.edu/
- How can I add courses to my course plan? ➤ From your home page click on Student Planning.
- How do I add sections to my course plan?
There are 2 ways to add sections to your course plan:From your home page click on Student Planning
Select Plan your Degree & Register for Classes in your Calendar View
To see available sections, click on view other sections. They appear as yellow on your calendar. If you add a section, the color become bold on your calendar.Through the Course Catalog
From the Course Catalog, you can view available sections for current and future semester. To add them to your plan select Add Section to Schedule
Course will appear in your course plan.
- How do I remove a course from my course plan?
You can remove the course by selecting Student Planning and selecting Plan your Degree & Register for Classes. From the Schedule tab or the Timeline tab. Click on the "x" in the upper right corner next to the course name. Finally, select the button Remove.
- How do I know if there is a scheduling conflict with my course sections?
Under the Schedule tab in the calendar view you will get a warning if there is a scheduling conflict. Also under the course name you will see a warning.
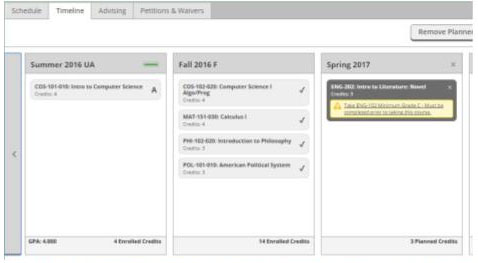
- How do I know if there is a pre-requisite or a co-requisite to a course?
A warning will show up when you try to add the course to your course plan and a warning will show under your course name under the Schedule tab and in the Timeline tab.
- How do I know my courses have been approved?
Once your Academic Adviser reviews your plan they will approve or deny the courses or plan. If approved, you will see a green Approved strip on your courses under the Schedule tab.
- If I move an approved course from one term to a different term, do I have to have that course re-approved?
Yes, you will need to get approval from your Academic Adviser if you moved an approved course to a different term. Make sure any changes you make, you leave a note to your adviser under the Advising tab and select the Request Review button so your adviser can review your plan.
- How do I register for courses?
Once you have your courses approved and sections planned, under the Schedule tab in the calendar view click on the Register button in the top right corner (right above your calendar view) to register for all courses at once. To register for one course at a time, click Register under the course name and section on the left side for your calendar view.
- How do I know I have registered for my courses?
Under the Schedule tab. Your courses will change from yellow to green on your calendar view. Also, you will get a green Registered strip on the course name on the left side of the calendar view under the Schedule tab. In your Timeline tab, the courses will change from a dark gray to a light gray and you will receive an acknowledgement email from the registrar's office once your course registrations are processed.
- How do I drop a course from my schedule that I have already registered for?
Go to the Schedule tab. Your courses will be listed on the left side of the calendar view. Under the course name on the left side, you will find a "Drop" button. Click "Drop" to drop the course. You will receive an acknowledgement email from the registrar's office every time you drop a course.
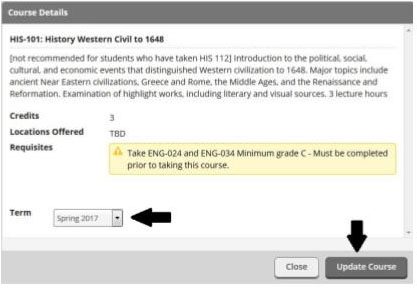
- How do I move a course from one term to another one?
To move a course to a different term; under the Timeline tab go to the term the course you want to move is currently. Click on the name of the course. In the small pop up window go to the Term area click on the action arrow and select the new term. Finally click on the Update Course to save change.
- How are the filters in the Course Catalog useful and why should I use them?
You can use the filters to narrow down the results for a course. You can filter by subject, term, day of the week, time of day, instructor, academic level, course type and location.
- My advisor wants me to "Request Review." What does that mean?
Once you have planned out your course(s) you want your Adviser to review what you have done. This is a "Request Review," click on Plan and Schedule. Now, click on the Advising tab. On the right side, you will see a gray "Request Review" button. Click on "Request Review." Now, you have sent a notification in "Student Planning" to your advisors that you have requested a review.

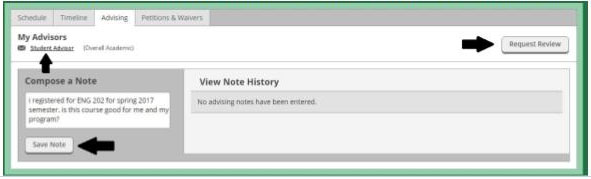
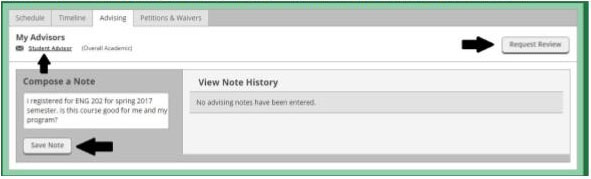
- My advisor wants me to send a "note." Is this an email?
No. Notes are not emails. Notes will only show under the Advising tab. This is one way to communicate with your advisors and for Advisors to communicate and keep a record of what was done assisting the student. All of your advisors can see the notes you save under this tab. To compose a note, type it in the "Compose a Note" area and click on "Save Note".
- How do I tell my advisor I'm ready for my courses to be approved?
We highly recommend you send a Note to your advisor to review your course plan from within Student Planning and to email your advisor and tell him/her your courses are ready to be approved. Both options can be done from within Student Planning. To do this go to Plan and Schedule and select Advising. Here is where you will compose a Note to your advisor. Type your note in the text box and click on the button Save Note and then click on the button Request Review. This will send a notification to your advisor to review your plan. You can also email your instructor from here by clicking on the link to your advisor's name. This will open up your email client were you can send the email.
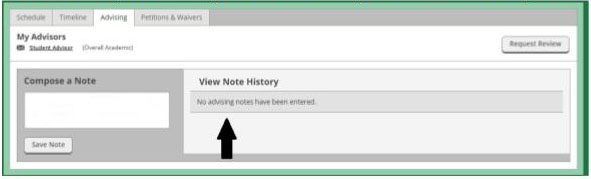
- My advisor said he/she sent me a note. Where do I find that note?
You will find any notes that your advisors send you under the Advising tab.
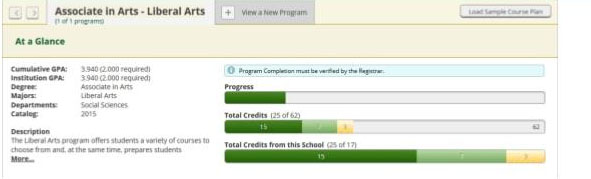
- What are the 3 bars at the top of My Progress and what do the colors and numbers mean?
You have 3 progress bars at the top of your My Progress page. The top bar Progress shows your progress towards completion for the degree program you are currently enrolled in. The second bar Total Credits shows your progress to the minimal required number of credits, 62 credits. It also shows your progress past, current and future progress. Dark green means you have completed those number of credits. Light green means those credits are in-progress. Yellow means those credits have been planned. The third bar Total Credits from this School shows your progress towards the 17 residential credits you are required to take from Mercer.
- Where can I find my Major GPA?
You can find your Major GPA on your My Progress page. Your GPA will be on the top left corner.
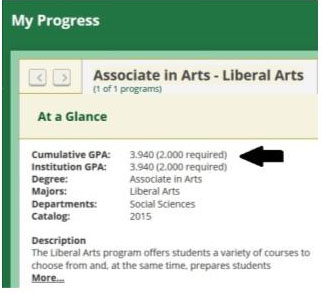
You can also track your GPA by term my going to the "Plan and Schedule" option and selecting "Time Line". This will break up your time line by term and you can see your GPA for that specific term.
- If I add a section to my plan, does it mean I am registered for that course?
No, adding a section to your plan does not guarantee a seat in that section. You can add any course to your plan. It will then appear in yellow on your plan. But it will not register you for the course until registration for that course is available and you select the option Register. Once selected the system will validate that there is a seat available and that you meet all of the restrictions and/or requisites. When you have successfully registered, the class section will have a green check mark in the upper left-hand corner on your plan and will appear in green in the calendar.
- Who do I contact if I have questions about Student Planning?
If you are having issues accessing Student Planning contact the ITS Help desk at 609-570-3300 or tec-help@mccc.edu. If you have a specific question about your courses, requirements or scheduling your course plan, please contact your academic adviser.
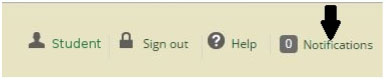
- How will I know if I have a hold on my account?
If you have a hold on your account, a notification will appear in the upper right-hand corner indicating the reason for the hold and the way to resolve it. In most cases, you will not be able to register if you have a hold on your account.
➤ Click on
➤ Enter your MyMercer portal Username and Password.
➤ Select the Self-Service icon.
➤ Click on the link for Student Planning
➤ Click on View Your Progress.
➤ Scroll down the Requirements page to select a required course from your program.
➤ Go to the course you want to add and click Search to access the course catalog
* Select the course
* Click Add Course to Plan
* Select Term in drop down.
* Click Add Course to Plan